“I sweep, sweep, sweep the floor where we won’t walk anymore” – Nikki Talley
Our kitchen floor is done!
The 2 events that have given me the most anxiety were the floor and cabinets. One down, one to go!
The floor was surprisingly easy, but I think the reason it was easy was all the prep work we did. I do believe its true when they say that any job is 80% prep and 20% implementation.
Once John got all the old floor up which consisted of tile, 3 layers of vinyl and old plywood, he repaired the subfloor where it had some water damage and then he swept, swept and swept to get all the dust up.
First thing to do was lay down quarter inch plywood. We bought a stapler and rented a compressor, We put approximately 1900 1 inch staples in the plywood. And then you know what we did? We vacuumed, vacuumed and vacuumed.
Next? Measure, measure and measure some more. Once we decided how we wanted our tiles to look, we measured, put a chalk line down and then made sure our 2 intersecting lines were perpendicular ( remember the 3,4,5 rule also known as The Pythagoras Theorem? Yes kids, math is important!) We also measured to make sure we wouldn’t end up with an inch or less of tile at the walls as a tile that small could crack. The floor was now broken up into 4 quadrants.
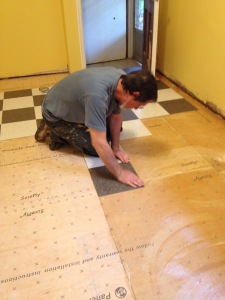
With all the prep work done it was time to get down to business. We put the adhesive down and waited for it to set, about an hour and a half. You then have up to 8 hours to lay the tiles. The tiles went down well. We laid them in a stair step pattern.
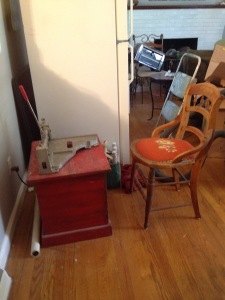
I handed tiles off to John and when full tiles were down in a section, John measured and I cut the tiles with a VCT cutter ( highly recommend!).
The quirks of Armstrong VCT tile: there is suppose to be a vertical/horizontal pattern within these solid colored tiles. Well there are flecks on them and I believe I figured out the pattern although John didn’t see it. Also, there is suppose to be a shiny side and a dull side. Damned if we could tell. The Internet was of no help as I found people who put the shiny side up and people who put the dull side up. We just put the damn tiles down and they all look the same. We also rented a 100 pound roller and rolled the tiles once they were laid.
Lesson learned 1: we didn’t need to split the floor into quadrants based on the 2 center lines. It took all day to do the floor due to waiting on the glue to set. If we would have had our perpendicular lines at an entrance way, we could have put the glue down on the entire floor and had it set in an hour and a half. The whole tiles would have taken an hour and the cut tiles probably another 45 minutes to an hour.
Lesson Learned 2: rent a VCT cutter. So easy to use and saved a ton of time.
I LOVE our floor! I’m so glad we went with our gut and said yes, we want a checkerboard and choose something most people may not consider -vinyl.
Lyric from “Feathers In A Jar” by Nikki Talley. Nikki is amazing and you can find her music here.


Looks awesome! It really is all about the prep – a lesson that took me far too long to learn.
LikeLiked by 1 person